The whipper snipper is a trusted gardening tool crucial for preserving nice and tidy green landscapes, especially when it comes to lawn edging. However, this dependable equipment occasionally needs to start, leaving us perplexed and annoyed.
Using our significant knowledge in the field, we’ll look at the most prevalent causes of a non-starting whipper snipper in this article. Whether it’s a gasoline problem or a spark plug problem, we’ve got you covered.
Stay with us while we assist you in troubleshooting and returning to your garden with ease.
Understanding your whipper snipper
Before we get into the nitty gritty of troubleshooting, it’s important to understand the basic components of your whipper snipper and their purposes. This understanding serves as the foundation for effectively recognising and addressing challenges.
Basic whipper snipper components
- Engine: The powerhouse that drives the tool; it’s where the fuel mixes with air to generate power.
- Spark plug: A crucial component that ignites the fuel-air mixture, enabling the engine to start.
- Fuel tank: Stores the fuel necessary for the engine’s operation.
- Air filter: Ensures that only clean air enters the engine, preventing dust and debris from causing damage.
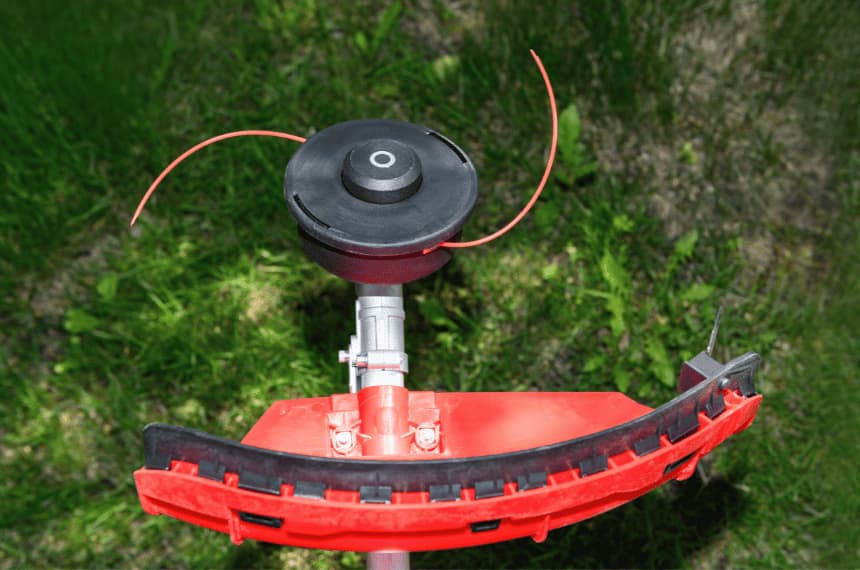
- Cutting head: The part responsible for the trimming houses the line or blade cutting the grass. They often come in different shapes and sizes, so it’s best to accommodate yourself with the different whipper snipper head types.
Initial check: how to start a whipper snipper
Sometimes, the problem is in the fundamentals. As a result, it’s critical that we start the whipper snipper appropriately.
Here’s a step-by-step tutorial to getting your whipper snipper up and running:
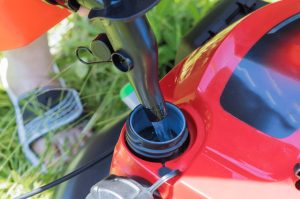
- Check the fuel: Ensure that there is sufficient fuel in the tank. If you have a 2-stroke engine, the fuel should be a correct mixture of petrol and oil.
- Inspect the spark plug: Make sure the spark plug is clean and properly connected.
- Prime the engine: If your whipper snipper has a primer bulb, press it a few times to draw fuel into the carburettor.
- Set the choke: Move the choke lever to the closed position to enrich the fuel mixture for starting.
- Hold the machine steady: Place the whipper snipper on a flat surface and hold it firmly.
- Pull the starter cord: Grasp the handle and pull it briskly until the engine sounds like it’s about to start.
- Open the choke: Once the engine makes a starting sound, open the choke halfway to allow more air into the engine.
- Pull the cord again: If necessary, pull the starter cord again until the engine starts.
- Let it warm up: Allow the engine to warm up for a few seconds before you begin using it.
If you follow these procedures, you should be able to start your whipper snipper without any problems.
However, if the situation persists, it is time to investigate it more.
What to do if your trimmer won’t start?
Don’t worry if your whipper snipper won’t start. We’ve laid out a methodical approach to identifying and resolving the problem.
The following are the first steps to take:
- Fuel inspection: Check the quality and age of the fuel and ensure the correct fuel-to-oil ratio for 2-stroke engines.
- Spark plug examination: Conduct a visual inspection focusing on colour, deposits, and gaps, then test the spark.
- Airflow and filter: Understand the importance of clean airflow and consider cleaning or replacing the air filter.
Below, we’ll take you through these checks and flag basic troubleshooting to get to the bottom of your whipper snipper failing to start.
1. Fuel inspection
The gasoline in your whipper snipper is critical to its operation. First, evaluate the fuel’s quality and age. Fuel that is old or polluted can stymie the starting process. It is best to use new fuel no more than a month old.
Maintaining the correct fuel-to-oil ratio is critical for 2-stroke engines. A faulty mixture can cause the engine to fail. To determine the correct ratio for your specific model, consult your user manual.
2. Spark plug examination
The spark plug is an important part of the ignition process. Begin with a visual examination to look for discolouration, deposits, or improper gaps indicating wear or damage. A good spark plug should be light brown or greyish tan in colour.
Remove the spark plug and ground it to the engine while pulling the starter chain to test the spark. A bright blue spark should appear. If not, the spark plug may need to be replaced.
3. Airflow and filter
Maintaining clean airflow is critical for your whipper snipper’s maximum operation. A blocked air filter can impede airflow and make starting the engine difficult.
Consider cleaning or replacing the air filter regularly to ensure smooth airflow. A clean air filter helps the engine start and extends its life.
Intermediate troubleshooting
If the initial inspections fail to identify the problem, it’s time to dig a little further. This section takes our troubleshooting to the next level, focusing on more specific components of your whipper snipper’s operation.
Here, we walk you through several steps to assist you in discovering and resolving any potential problems that may be causing the hiccup:
- Carburettor concerns: Recognising signs of a dirty carburettor and understanding when to opt for basic cleaning or professional servicing.
- Fuel system insights: Checking the fuel filter and fuel line and comprehending the importance of a vented fuel tank.
- Ignition system: Understanding the role of the recoil starter and how to address common spark arrestor issues.
4. Carburetor concerns
A properly working carburettor is required for your whipper snipper to run smoothly. It can accumulate dirt and grime over time, causing starting problems. The first step in troubleshooting is recognising indicators of a dirty carburettor, such as difficulties starting, uneven idle, or poor performance.
When it comes to carburettor problems, there are two options: basic cleaning or professional servicing. While basic cleaning can be done at home using a carburettor cleaner spray, more complex difficulties may necessitate the services of a professional.
5. Fuel system insights
Another crucial location to evaluate is the fuel system. Begin by inspecting the gasoline filter and fuel line for any obstructions or damage. A clogged fuel filter can reduce the flow of fuel to the engine, causing issues starting.
Furthermore, recognising the significance of a vented gasoline tank is critical. A properly vented fuel tank allows for a smooth flow of fuel while preventing vacuum building. To ensure a steady fuel supply, ensure the vent is not obstructed.
6. Ignition system
The ignition system is essential for getting your whipper snipper started. The recoil starter is an engine component that aids in starting the engine. Check that it is in good working order and that it runs smoothly.
It is also critical to handle typical spark arrestor concerns. The spark arrestor keeps flame particles out of the exhaust. It can become clogged over time, impeding the beginning process. This problem is frequently resolved by cleaning or replacing the spark arrestor.
Advanced diagnostics
If your whipper snipper still refuses to cooperate, we’ll have to go deeper into sophisticated diagnostics. This stage necessitates thoroughly evaluating some of your tool’s most sophisticated features. In this section, we delve further to find potential flaws at the root of the problem:
- Dealing with a flooded engine: Recognising symptoms and a step-by-step recovery guide.
- Electrical circuitry: Insights into ensuring the functionality of the power switch and methods to test the circuit’s integrity.
- Environmental factors: Understanding the repercussions of extreme temperatures and guidelines for storing during off-seasons.
7. Dealing with a flooded engine
A flooded engine is a common cause of your petrol whipper snipper not starting. It is critical to recognise the symptoms; you may notice a strong petrol odour or witness fuel seeping from the carburettor.
Here’s a step-by-step path to recovery:
- Remove the spark plug and check for wetness, which indicates flooding.
- Dry the spark plug and clear the excess fuel from the cylinder by pulling the starter cord several times.
- Reinstall the spark plug and try starting the engine with the choke off.
8. Electrical circuitry
The electrical circuitry in your whipper snipper is the backbone of its operation. To begin, check the power switch; a malfunctioning switch can prevent the engine from starting.
Next, concentrate on ensuring the circuit’s integrity. A multimeter can be used to test the electrical connections for continuity. To restore functionality, any faulty circuits should be fixed or replaced.
9. Environmental factors
Environmental conditions might have a considerable impact on your whipper snipper’s performance. Extreme temperatures can influence the fuel’s viscosity and the battery’s performance, making it difficult to start the engine.
Furthermore, proper whipper snipper storage during the off-season is critical to the longevity of your tool. Always keep it in a dry, cool area and winterise it according to the manufacturer’s instructions, which may entail draining the fuel and disconnecting the battery.
Maintenance: Prevention is always better than cure
In our gardening adventures, we’ve discovered that a stitch in time saves nine. Keeping your whipper snipper in good working order not only assures smooth operation but also increases its lifespan.
Let’s look at some preventative steps that can be beneficial in the long run:
Routine checks and cleaning
The key to a long-lasting whipper snipper is regular maintenance. Here are some cleaning and maintenance tips that we stand by:
- Visual inspection: Regularly inspect the tool for any visible damages or wear.
- Cleaning: After each use, clean the cutting head to remove grass and debris.
- Lubrication: Ensure that moving parts are well-lubricated to prevent friction and wear.
Using fresh duel and quality oil
The lifeblood of your whipper snipper lies in the quality of the fuel and oil used. Here’s why it’s vital:
- Fresh fuel: Using new fuel prevents clogging and ensures optimal performance.
- Quality oil: For 2-stroke engines, using quality oil is crucial to maintain the right viscosity and prevent engine damage.
- Proper storage: Store fuel in a cool, dry place and use it within a month to maintain its quality.
Seasonal Storage Tips
As seasons change, so do the needs of your whipper snipper. Here are some tips to prevent starting issues during seasonal transitions:
- Winterising: Drain the fuel and remove the battery before storing it for winter to prevent damage.
- Covering: Use a protective cover to shield your tool from dust and moisture.
- Space: Choose a dry, cool storage space to prevent rust and other environmental damage.
When to seek expert help
No matter how adept we become at troubleshooting, certain issues require a professional touch. Here are some scenarios where a visit to the service centre is warranted:
- Persistent starting issues: If your whipper snipper consistently faces starting problems despite your troubleshooting efforts, it might be time to consult the experts.
- Unusual noises: Should you notice any unusual noises or vibrations, it’s a clear sign that a professional inspection is needed to prevent further damage.
- Complex repairs: For repairs that involve opening up the engine or dealing with intricate parts, it’s best to seek expert help to avoid exacerbating the issue.
Warranty considerations
Understanding and adhering to the warranty terms can save you from unnecessary expenses and hassles. Here’s what you need to keep in mind:
- Warranty terms: Familiarise yourself with the warranty terms of your whipper snipper. It often covers repairs and replacements of parts within a specified period.
- Voiding the warranty: Be cautious not to undertake any actions that might void the warranty, such as using non-original spare parts or tampering with the sealed components.
- Documentation: Keep all necessary documents, like the purchase receipt and warranty card, in a safe place, as they would be required to avail of warranty services.
You ensure a long and fruitful relationship with your whipper snipper by recognising when to seek expert help and understanding the intricacies of warranty considerations.
Conclusion
Over the years, we’ve witnessed firsthand how a little attention and care can go a long way in preventing those frustrating moments of breakdowns.
We encourage you, our fellow gardening enthusiasts, to embrace timely troubleshooting as your ally. It’s not just about fixing issues but nurturing a relationship with a tool that has been a steadfast companion in your gardening journey. Remember, a well-maintained whipper snipper stands the test of time and becomes a reliable partner, ready to spring into action whenever called upon.
As you step back into your lush gardens, armed with newfound knowledge and insights, we hope you do so with renewed confidence and enthusiasm. Here’s to many more blissful hours of gardening with your whipper snipper humming harmoniously by your side.
FAQs
How does the age of my whipper snipper affect its starting capability?
Over time, parts wear out, and rubber components like hoses can degrade. Older whipper snippers might face issues from worn-out parts and accumulated dirt and residues that can affect their performance.
Can altitude or humidity levels impact my whipper snipper’s ability to start?
Yes, altitude can affect the air-to-fuel ratio and high humidity can introduce moisture into the system, potentially affecting the ignition or fuel quality.
What’s the difference between a whipper snipper and a line trimmer, and do they have similar starting issues?
They are essentially the same tool but can differ depending on your region. Both can face similar starting issues due to their comparable mechanisms and functions.
For more information, check out our guide on line trimmers vs. whipper snippers.
How often should I replace the spark plug to ensure optimal starting conditions?
While spark plugs can last a long time, it’s recommended to check and clean them regularly and consider replacing them every season or after every 25 hours of use for optimal performance.
Should I take any safety precautions when troubleshooting my whipper snipper’s starting issues?
Always ensure the tool is turned off and unplugged (if electric) before starting any troubleshooting. Wear gloves and safety glasses, and work in a well-ventilated area away from open flames, especially when dealing with fuel.