Whipper snippers, also sometimes called weed eaters or weed whackers, are a common and popular gardening tool. Many homeowners rely on these handy tools to keep their grass trimmed and their garden beds clean and neat. With a versatile set-up and easy-to-use design, whipper snippers are a staple of Australian gardens.
But how do you make sure you are taking care of them properly? Are there any special maintenance and upkeep considerations to know? How can you get the most out of your whipper snipper or line trimmer?
Our experts wanted to help you with that today, so let’s dive into it!
Understanding whipper snippers
There are many different types of whipper snipper types. What you want for your garden will depend on what you need to use it for. Regardless of heads, lines, handles, and motor features, whipper snippers can be broken down into these three main categories:
Petrol whipper snippers
These are the most powerful engines available. They are ideal for commercial and highly demanding jobs. Although they are ideal for professional landscapers, they can still be used by many Australian home gardeners.
They are fully portable, making large projects easier to run through. They do require some maintenance and upkeep. Many petrol whipper snippers require you to mix the fuel yourself, which can be a delicate process for some.
Battery whipper snippers
These tools are the most common ones seen in home gardens. They are lightweight and easy to use without the concern over fuel costs, spills, or mishandling. It is also easy to store these battery-whipper snippers, and they are powerful for their size.
The big advantage of the battery is it charges quickly, is pollution free, and is perfect for small yards. The big disadvantage is that it only can work when the battery is charged. If the battery is dead, you have to wait till it’s charged to use it.
If this seems like the right choice for you, check out our guide on the best battery whipper snipper in Australia!
Electrical whipper snippers
These electric corded models are also popular because they are light, powerful, easy to use, and emission-free. They work well in smaller spaces that allow for easy access, which can be done in a single weed-eating or edging session.
Of course, the downside is that you must watch the cord and drag it along as you work. It can be cumbersome with a larger yard that needs long extension cords to reach. Corded whipper snippers are ideal for quick jobs.
If this model seems the perfect for your gardening needs, check out this guide on the best electric whipper snipper.
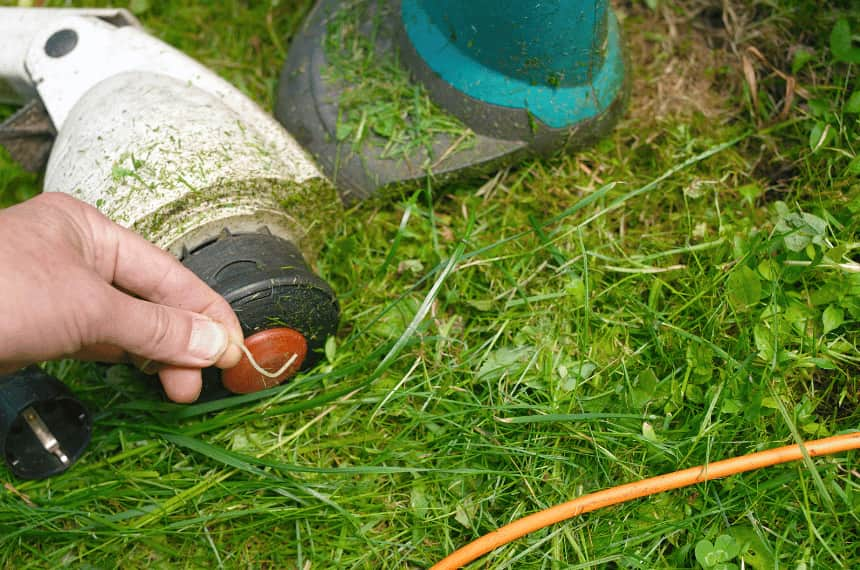
Before replacing the whipper snipper cord
Replacing the cord is one of the most common aspects of whipper snipper maintenance and upkeep.
That is, what cuts the grass and plants as you use the whipper snipper, and needs to be changed out and replaced when it runs out.
Preparing for this task is critical because even though the process is simple, being prepared will make a world of difference.
Tools and materials needed
Changing the cord on your whipper snipper requires minimal tools in most cases. Aside from the new spool of string, you will need a pair of garden or work gloves, scissors or other tools to cut the string, and if you want some water, keep the string clean while you work.
Safety first
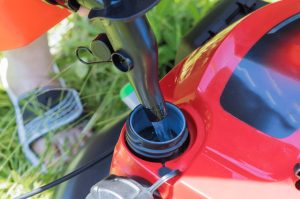
As with any garden or landscape project, there are a few safety precautions you should note before you begin. When changing out your cord or string, it is best to have petrol whipper snippers empty of their fuel as a general safety precaution.
Battery whipper snippers should have the battery removed to prevent accidentally triggering the string while you are working.
Same with a corded whipper snipper, it should be unplugged for safety before you begin working on changing out the string. You will also want gloves, safety goggles, and a long sleeve shirt to protect yourself when you are maintaining, cleaning, using, or putting away your whipper snipper.
Step-by-step replacement for whipper snipper cord
Changing the cord on your whipper snipper is fairly straightforward, but you must know what kind of system you have.
Some whipper snippers have a single line of feed, some have two or three, others come with pre-cut nylon string, and others require full spool replacement.
Below are some tips from our gardening experts to help you with the most common kind of line and cord replacements:
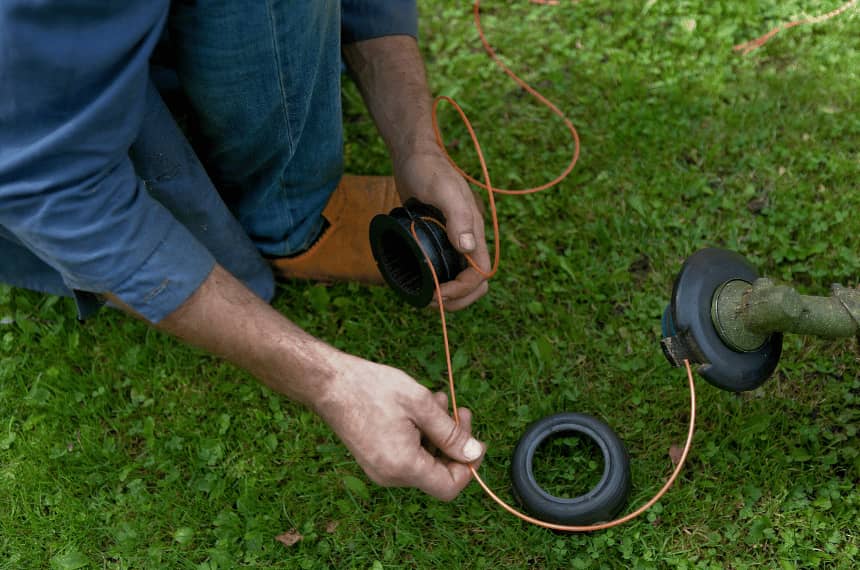
Changing the cord on a single-line whipper snipper
- Remove the cap covering up the spool of wire. This may be with tabs on the side, or you may need to pry the carp off carefully to access the string.
- Pull the spool out and remove the old wire. Be sure to note how the string was wrapped and loaded as you do this.
- Cut 6-7 metres of replacement string from your new spool. Then you will need to attach it to the spool the same as it was when you removed it.
- Reinstall the spool and put the cap back in place. That is it; you are done restringing your whipper snipper and are ready to get to work.
Changing the cord on a double-line whipper snipper
- Remove the cap to access the spool of the whipper snipper string. This may use tabs on the side of the cap, or you can simply pry off the cap on many models.
- Remove the old wire and excess remnants that might be left on the spool. Dispose of the excess wire and prepare the new spool.
- Cut off 6-8 metres of string and feed it through the hole on the whipper snipper’s head. It should come out the other end of the head.
- Move the string so there are equal amounts on both sides. Then keeping the strings together, wrap the string around the spool and reinsert it.
- Feed the two ends through the respective holes, then secure the cap. Your whipper snipper is reloaded and ready to be used.
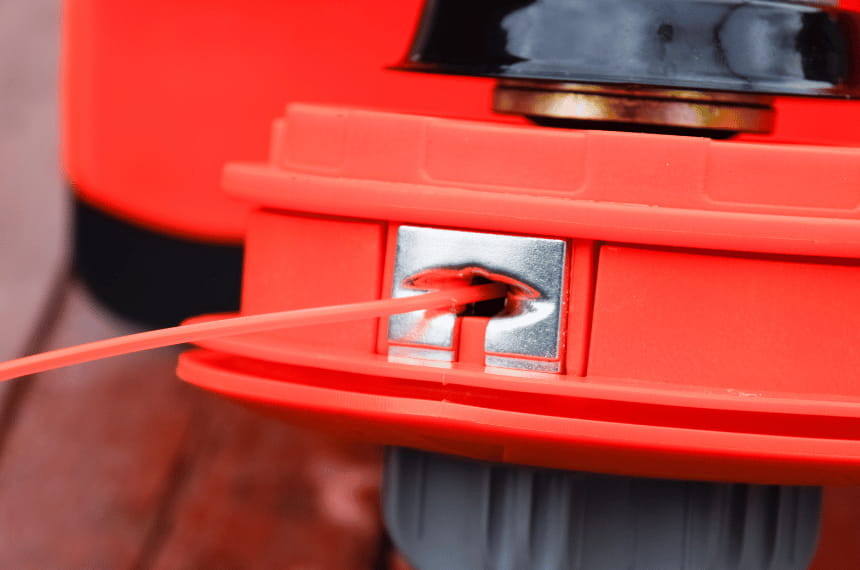
Changing the cord on a speed-feed whipper snipper
- Prepare your string for the replacement, following the guidelines recommended for your model. Usually, around six metres is more than enough.
- Rotate the cap to align the indication arrows with the threading eyelets. Once everything is aligned, you can see light through the eyelets easily.
- Thread the end of the trimmer and insert the line through one eyelet. Continue feeling the line till there is an even amount on both sides of the whipper snipper head.
- Keep the lines together and hold taunt. Turn the head clockwise and keep doing so until you have around 12-13 centimetres of line exposed.
- Ensure the ends are fed through the eyelets correctly. Replace the cap, and you are ready to use your whipper snipper.
Changing line on a bump feed whipper snipper
- Take apart the trimmer head with the tabs or lid indications given. Remove the old line and clean the spool of any debris.
- Cut two 25-centimetre pieces of line and line them up together. Insert the lines into the spool holes and feed them through. Secure the lines in place so they don’t move freely.
- Wrap the new line around the spool, following the arrows that indicate what direction. Once you’ve got about 10-12 centimetres, tuck the string ends into the holding notches.
- Reinsert the spool with the new line. Locate the eyelets and string the new line through the holes. Pull them firmly so the strings are tight, and replace the cap back on the reel.
Troubleshooting common problems
- Whipper snippers won’t start– the most common reasons are clogged air filters, bad spark plugs, or an issue with the engine itself.
- The cord line keeps jamming- the usual reason for the lines to jam is that they get crossed and tangled in the spool from improper winding and loading.
- Engine sputtering and stalling- the common culprit for this problem is improper fuel mix on petrol engines or a low power supply on electric models.
- Line is tangling rather than cutting- the normal reason the line gets tangled is either cut too long or the grass you are cutting is too tall and thick.
If you have any questions and do not know how to proceed, be sure to contact the manufacturer and ask them for advice and guidance on troubleshooting your whipper snipper concerns.
Maintenance tips for your whipper snipper
Keeping your whipper snipper in good working order requires careful attention to detail. You need to take care of your equipment when using it and between uses.
It is key to know how to use a whipper snipper and keep it in tip-top shape. We recommend the following maintenance tips to help you get the most out of your whipper snipper every season:
- Clean and inspect the trimmer often, at least after each use and after it has not been used or stored for over a month or two.
- Check/change oil and fuel on petrol whipper snippers and follow the recommended schedule as listed in the user’s manual for your model.
- Check plugs and cords on electric whipper snippers and look for any signs of wear, fraying, animal chewing, or other connection issues.
- Store your whipper snipper trimmer appropriately, remove oil and fuel if you will not use it for more than 3-4 months, and keep it in a cool, dry place.
- Follow the manufacturer’s guidelines.
Final thoughts
Whipper snippers, essential in Australian gardens, come in various types, each catering to specific needs. This guide has demystified replacing the whipper snipper cord a common maintenance task, providing step-by-step instructions for different models.
Along with safety precautions, troubleshooting tips, and general upkeep practices, this comprehensive guide empowers garden enthusiasts to take full control of their whipper snipper’s performance.
So, whether you’re a professional landscaper or a home gardener, these insights ensure that your garden remains neat and your whipper snipper operates efficiently.
FAQs
Can I replace the whipper snipper cord myself, or should I seek professional assistance?
Most whipper snippers are designed for easy cord replacement. You can look for user guide information or online videos and tutorials if you have questions or concerns. If there are doubts still in your mind, you can call the manufacturer for customised assistance.
Can I use a whipper snipper cord that’s different from the manufacturer’s recommendation?
Many generic strings and cords will work with various whipper snippers. However, using the type specified in the instruction manual is always advised. This will just further ensure your Whipper snipper works at maximum efficiency.
How often should I replace the whipper snipper cord, and what are the signs that it needs replacement?
Frequency or replacement will depend largely on how often and how much you use it each time. If the string is too short or worn out, it may be time to replace it.
How do I properly dispose of my old whipper snipper cord?
Check if your local recycling or waste management centre has special protocols or drop-off locations for your old string and cords. If not, you should cut the string into smaller pieces so they don’t get tangled around wildlife.